
A Rainbow is something that has the power to stop you in your tracks when it unexpectedly appears when you’re least expecting to see one. They’re beautiful – but how do you photograph a rainbow?
Following are a few Rainbow Photography Tips that come to mind – feel free to add your own to comments below:
Find a Rainbow
This is the most obvious but also perhaps the hardest part of the process. Their appearance will depend upon the conditions and they are something that will often happen completely out of the blue. Having said this – you should especially be on the look out for rainbows when you have two elements present – falling/spraying water droplets and bright sunlight. As a result they’re common when a storm is approaching and around waterfalls/sprinklers/fountains.
Backgrounds
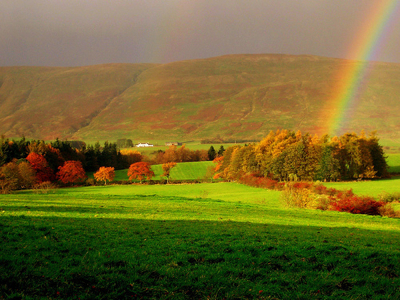
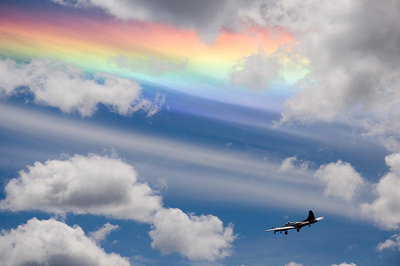
As rainbows are not solid objects one of the keys to photographing them is to capture them in front of a background that allows them to stand out as much as possible. Ideally you’ll want to get a background that is uncluttered and if possible one that has darker colors (think dark clouds, mountains etc). While it’s not always possible to change the background – you might find that you’re able to change the angle that you’re shooting from or to focus just upon part of the rainbow that is in front of a good background.
Composition
While rainbows are a beautiful thing – it’s the surrounds that they appear in that make one rainbow photograph really stand out from others. As a result it’s important to carefully think about how you compose your shot when photographing them. Particularly pay attention to the following:
- Positioning – how you position the rainbow (and the rest of the landscape) in your shot is important. Rules like the rule of thirds could be useful when thinking about focal points and leading the eye into your shot.
- End Points of the Rainbow – the point where a rainbow hits the ground/horizon is an important point in any rainbow photograph. This is a natural point of interest so think about where you’ll put it in the frame. You might want to zoom in on this spot or even quickly change your own position so that it lines up with some other object in the scene.
- Zoom/Wide Angle Perspectives - quickly experiment with different focal lengths (if you have different lenses or a zoom). A wide angle lens that captures a full rainbow can give you some wonderful wide vista shots – but don’t forget that zooming right in on a part of the rainbow can also lead to spectacular results. Particularly focus in on any point where the rainbow intersects with any object – or where it begins and ends.
Read more: http://www.digital-photography-school.com/how-to-photograph-a-rainbow#ixzz1OpxvqXzy
No comments:
Post a Comment