Manna Dey continued to sing at concerts and in Bengali cinema long after he had retired from Bollywood. Manna De was honoured with the Padma Shri in 1971. In 2005, he received the Padma Bhushan, India's third-highest civilian honour. He was also presented with the prestigious Dadasaheb Phalke Award in 2007 and received the Filmfare Lifetime Achievement Award in 2011.

Friday, December 20, 2013
Monday, December 2, 2013
Shah Rukh Khan's Red Chillies VFX likely to work on Salman Khan’s 'Kick'

Ever since the release of Krrish 3, Shah Rukh Khan's Red Chillies VFX
has been garnering a lot of appreciation for their visual effects in the
super-hero flick. Thus, it won't be surprising, if the company is brought on
board for several other films as well. Buzz is that Red Chillies VFX may work on
Salman Khan's Kick, though there's no confirmation on this front as of
now. This Salman Khan starrer film helmed by Sajid Nadiadwala has been in news
for a while, it is currently in midst of a marathon shooting schedule in Panvel.
Now with there being a minute possibility of Salman Khan and Shah Rukh Khan
working together in a film, at least Kick would be instrumental in
getting them together offscreen at least. As of now though, Salman is shuffling
between the shoot of Kick and Sohail Khan's Jai Ho. In the
meanwhile, Red Chilies VFX, is working on Farah Khan's Happy New Year as
well.
Friday, November 8, 2013
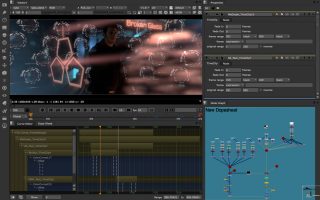
NUKE 8 is coming: here’s what you need to know
A new version of The Foundry’s flagship product will be shipping in 2013, with the company announcing at IBC that NUKE 8 is set for launch later this year. The Foundry’s timeline tool for NUKE, HIERO, will also be upgraded to version 1.8 this year.
fxguide speaks exclusively to NUKE Product Manager Jon Wadelton about the changes – see below. But first, just what are the main upgrades in NUKE 8?
Dope Sheet – artists will be able to see and move keys around in the context of a timeline style view. They will be able to see the results and each property of a node accurately displayed in context. The Foundry says the new viewing capability will make working with any scripts that involve time manipulation a much more simple process
New Text node – lets artists compose, edit and animate directly in the viewer.
Color grading and correction – the NUKE UI has been updated to include an in-panel color wheel to control hue, saturation and value, with an automatic precision mode or optional absolute mode for finer tweaking. There’ll also be a new Pixel Analyser and a Match Grade node.
New scope tools – can be used to analyse the picture like Waveform, Vectorscope and Histogram viewers.
Camera Tracker – this is being updated to add to add to the set solve functionality and will let artists track and solve cameras from reference stills. The Model Builder will also feature UV creation.
Camera Tracker.
New 3D tools – includes Viewer Capture to allow users to flipbook images from the 2D and 3D Viewer, a new Edit Geo node, a Particle Cache node and the Wireframe Shader node for various visual effects and increased control over projection mapping.
Deep Output to the Scanline Renderer – part of the Deep Compositing workflow.
Open source – OpenEXR 2.0 multi-part image read and write support and Alembic 1.5 support.
In-context help system – this is a new feature for NUKE 8.
Developer tools – developers will be able to write their own image processing operations inside of NUKE using the new Blink Script node, which utilizes the GPU. Developers will also be able to rely on the new Import NUKE function to use NUKE as a module in any Python interpreter, and developers of C++ plugins will be able to output planar data via the new Planar Rendering Framework.
HIERO updates – changes include improved playback performance, color handling controls, and editing audio controls that will give users access to Per Track and Per Item Volume Controls.
NUKE Product Manager Jon Wadelton on NUKE 8
fxg: The Text node – how far will this go in allowing NUKE a greater role in solving graphic design style projects. Is this a stepping stone or do you believe you have a killer text node now?
Wadelton: We are really happy with the capabilities of the new Text tool. We believe it will make most graphic design projects much easier than before. We have common features such as typing in the viewer with cut/copy/paste, per character kerning, per character transform animation, group animation and more. It’s a huge step forward from the previous tool, but of course we never rest in the NUKE team so no doubt it’s still not the final iteration of the tool and it will evolve further in the future.

WireFrame node.
fxg: The issue of colour grading has been a big deal for some time now with the Foundry not having a colour grading option. NUKE is aimed more at a shot than an entire edit…so how do you see this being used? Is this a path forward for HIERO – to adopt GPU colour grading?
Wadelton: We’re certainly making NUKE and HIERO work much more closely together. NUKE 8 for instance has adopted all the colour scopes tools from HIERO. We have been playing around with the idea of the reverse of this which we will be showing in our IBC The Foundry Labs demo this week.
As for the updated grading and colour correct tools in NUKE 8, we still see that as something you’d use to match individual elements or plates. We have a much more friendly colour wheel interface for all the colour tools, the new match grade tool, colour analysis scopes and options such as maintain luminance on the hue-correct and more.
fxg: How does the new Match Grade node compare to the old Furnace MatchGrade and/or the match grading algorithms of OCULA?
Wadelton: The new match grade allows you to analyse a sequence to give you a stable LUT that will grade one plate to match another. This differs to the old match grade that could only generate a grade from one frame. The new match grade also has options to export to the LUT to a file (e.g csp, cube etc). The algorithm has also been updated since the original furnace MatchGrade based on research used in OCULA.
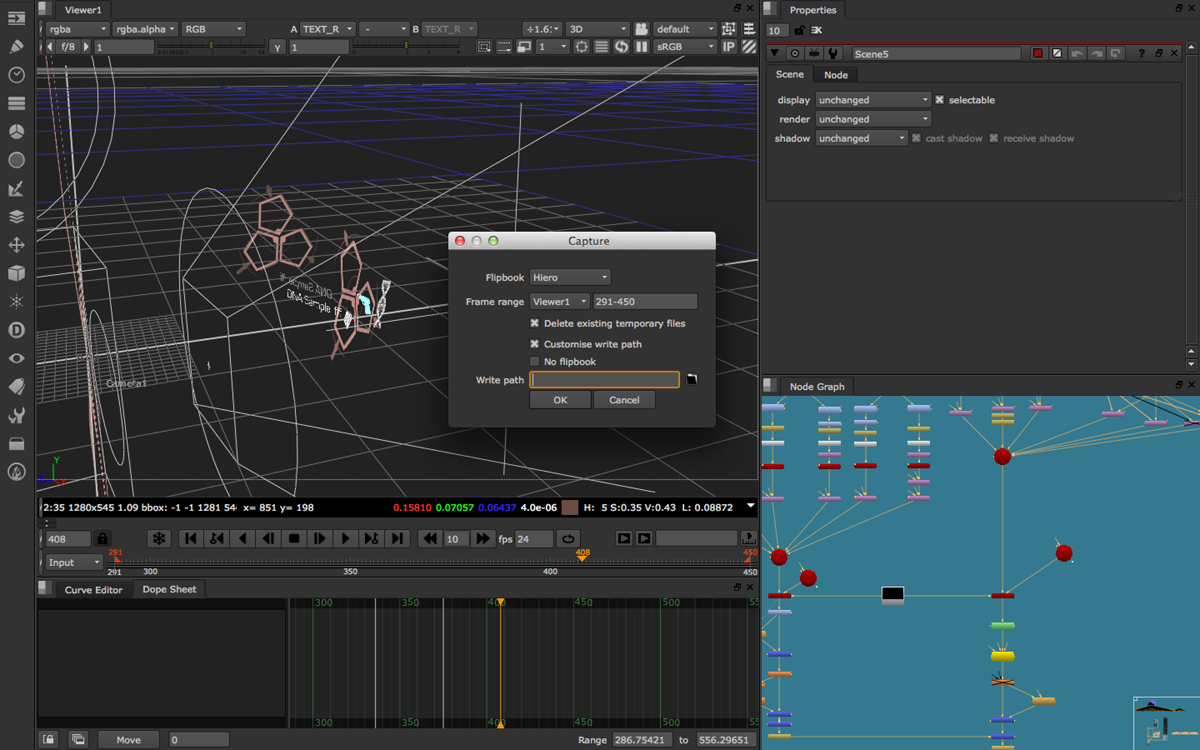
ViewerCapture node.
fxg: The NUKE Camera tracker…any interest in accessing the i/tech (i/tech squared) data from Cooke and other lens companies being shown at IBC? PF Track will access the inertial guidance data and of course lens data/zoom etc
Wadelton: We have discussed accessing more camera metadata with Cooke and some camera manufacturers. This data could be used to lock off or restrict parameters to improve the camera solve. So it’s something we’re looking into for the future.
fxg: How much will the Particle Cache node speed up rendering? Have you benchmarked it?
Wadelton: The particle cache can considerably increase render speed and increase interactivity in a heavy script. The node caches out the particle simulation to disk. So once the artist is happy with the simulation it can be committed to disk eliminating the simulation time from overall render time.
Depending on how heavy the simulation is, this can save considerable time. It also really helps in the render farm situation where independent render slaves are each rendering a frame each. Without the cache these slaves would need to ‘run up’ the simulation to the frame that they are rendering, with the cache this is not necessary.
Above: NUKE Product Manager Jon Wadelton outlines the new features in NUKE 8.
fxg: Can you expand on what you can now do in the EditGeo node that you could not do before please?
Wadelton: The EditGeo node is a new node that allows you to move vertices and faces of geometry flowing down the node graph. It can save a round trip to a 3D application when your geometry is not quite right. For instance you are doing a projection and the geo and some verts are not quite in the right position. With the EditGeo you can quickly correct this in the comp.
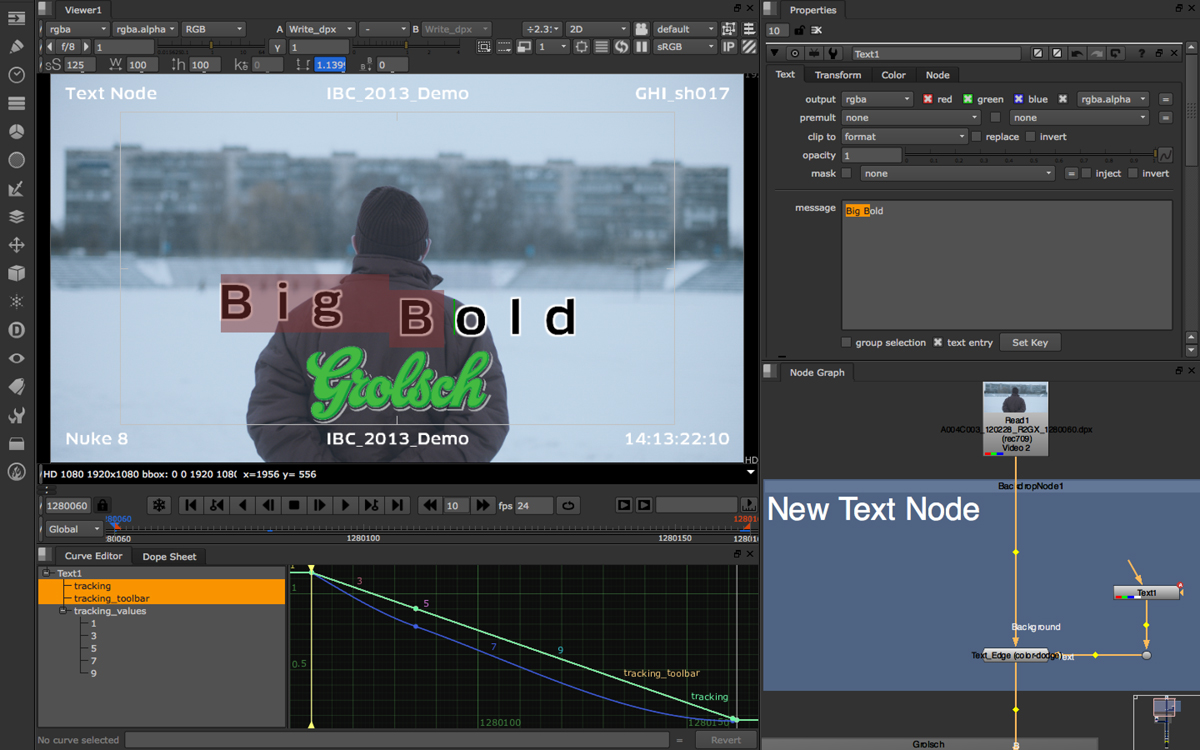
TextNode.
fxg: Could you explain for people who don’t know what the Planar Rendering Framework is please?
Wadelton: It’s a new API for C++ developers who need to develop Planar or Tile based rendering plugins. NUKE is a scan-line based render system but not all algorithms fit to this style of rendering. Developers who need to render in tiles or planes can use the API rather than writing their own system to convert from scan-lines to tiles. The advantage for developers is much reduced complexity for implementing tiled rendering along with NUKE taking care of all the memory management. NUKE internally now uses this API for tile based rendering such as OFX, Blink based nodes and EXR files that are compressed into tiles. For the artist this will give them speed increases, reduced memory use, and more stability.
fxg: Could you discuss the adoption and success for Deep Comp pipelines that has lead to the scan-line Deep Output please?
Wadelton: Deep comp is becoming more widely used across film pipelines worldwide especially since more renders are starting to support the Deep EXR 2.0 format. A good example was MPC Vancouver’s work on Life of Pi for which they won them the VES outstanding compositing in a feature motion picture last year. That sort of shot would have been very difficult and time consuming without the deep compositing tools at the artist’s disposal. Part of the feedback we’ve had is that it would be great to integrate NUKE 3D elements into an existing deep scene, whether that be the NUKE particle system or just simple 3D elements to act as holdouts. That’s what we’ve added in NUKE 8. The NUKE internal scan-line render can now produce deep data directly to integrate with your existing deep elements.
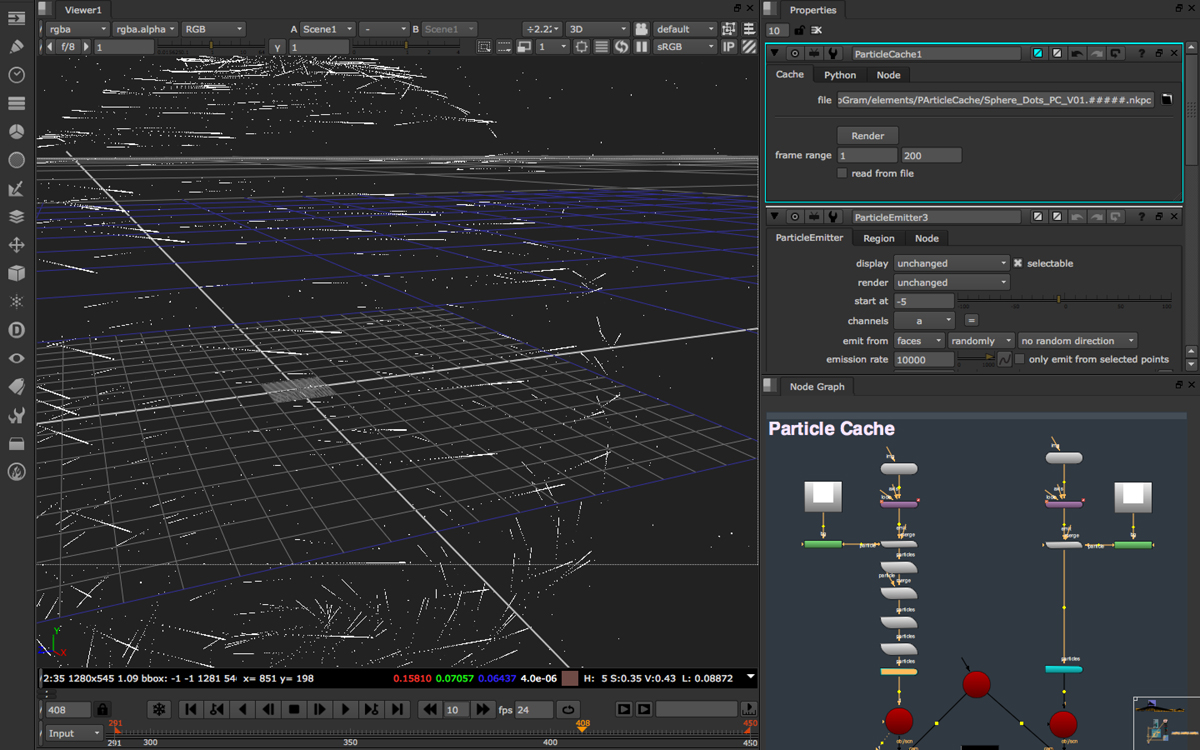
ParticleCache.
fxg: How extensive has the beta process been? When can people download NUKE 8?
Wadelton: We have been in closed beta for several months and the feedback has been really positive. We will be opening this up very soon.
fxg: The Dope Sheet is a great advance – can you discuss the user feedback – from Beta or other – that shaped its development please?
Wadelton: NUKE has always had powerful procedural ways of moving and retiming elements around in time. The feedback we had was that you were very much shooting in the dark as to where all your elements had been moved to, so you could get lost fairly easily. The new dope-sheet solves this by showing all the keys and all the elements at their time shifted locations in a context sensitive way. So if you view keys before a node that moves them in time, you see them at their original time. If you view after the time manipulation, you also see them where they’ve been shifted too.
Courtesy : www.fxguide.com
Wednesday, October 23, 2013
Manna Dey: Thank you for the music

Prabodh Chandra De, better known as Manna Dey, one of Bollywood's best-loved voices, died in Bangalore after a prolonged illness. The voice behind Laga chunri mein daag from Dil Hi To Hai, Ae Meri Zohra Jabeen from Waqt, Yeh Dosti from Sholay, Babu Samjho Ishaare from Chalti Ka Naam Gaadi and other memorable Bollywood hits, Manna De celebrated his 94th birthday this year and was awarded West Bengal's prestigious Vishesh Maha-Sangeet Sammaan in April.
Manna Dey was born on May 1, 1919 in Kolkata. He began singing while still in school and stood first in various inter-college competitions while at Kolkata's Scottish Church College.Manna De took his first formal music lessons from his uncle Krishna Chandra Dey, who was a music director and composer, and began his Bollywood career as his uncle's assistant in 1942.
He worked independently as a music director for various Hindi movies before making his singing debut with the movie Tamanna in 1943. His very first mentors were Ustad Aman Ali Khan and Ustad Abdul Rahman Khan from whom he took lessons in Hindustani classical music.
One of the greatest playback singers in Indian cinema, Manna De sang in many Indian languages including Hindi, Bengali, Assamese, Gujarati, Malayalam, Punjabi, Kannada and Bhojpuri. He partnered with Mohammed Rafi, Kishore Kumar, Lata Mangeshkar and Asha Bhosle for several hit duets. He also formed successful pairings with actors Raj Kapoor and Rajesh Khanna, and composers Salil Chowdhury, Hemant Kumar and Laxmikant-Pyarelal.
Manna De ruled the playback music scene from the 1950s to the 1970s. Some of his greatest hits are: Laga chunri mein daag (Ae Mere Pyaare Watan (Kabuliwala, 1961), Zindagi Kaisi Hai Paheli Haai (Anand, 1970), Poochho Na Kaise Maine Rain Bitaayi (Meri Surat Teri Aankhen, 1963), Chalat Musafir Moh Liya Re Pinjare Wali Muniya (Teesri Kasam, 1966), Kaun Aaya Mere Mann Ke Dwaare (Dekh Kabira Roya, 1957), Kasme Vaade Pyaar Wafa Sab (Upkar, 1967) and Dil Ka Haal Sune Dilwaala (Shree 420, 1955). He sang Mehmood's part in the duet Ek Chatur Naar (Padosan), Raj Kapoor's part in Pyar Hua Ikrar Hua (Shree 420) and Yeh Raat Bheegi Bheegi (Chori Chori), and Pran's famous song from Zanjeer, Yari Hai Imaan.
Source: BBC India
Saturday, October 12, 2013
"redchillies.vfx Team has delivered 1500 VFX shots in "Chennai Express"..
redchillies.vfx”team has delivered 1500 VFX shots for Rohit Shetty’s Chennai Express.This Shahrukh Khan starrer movie that grossed 410 crores and has become highest grosser in Indian Cinema

The team created many seamless complex CGI transitions complimenting the scenes and storyline of the film. So what was Rohit Shetty’s vision for the VFX of Chennai Express? Keitan Yadav, COO of redchillies.vfx shares with Animation Xpress.com, “Rohit’s vision for the movie was to make the film look stunningly beautiful, rich & vibrant with breathtaking scenery, skies and colors.He wanted natural pleasant feel with very distinct feel to two villages. With magic hour environment at places and full open blue skies during journey the experience was enhanced. A lot of beautification has gone into songs like “Chipak Chipak ke” and “Titli”, informs Keitan

Haresh Hingorani (Harry), Chief Creative Officer, redchillies.vfx, adds here, “Rohit wanted us to instill mood transitions, instead of direct cuts or dissolves between shots. We then pre-visualized these sequences, and designed the transition to enhance the storyline, which has come out extremely good and being appreciated by the audience.
The render time for certain VFX shots in the movie went up to 10-15 hours per frame as many shots were worked on 4K resolution and quite complex due to vegetation and waterbodies added.
Another sequence where tranquil beauty of a setup was enhanced is train coming to a stop at a waterfall. Landscape enhancement along with waterfall took this scene to a different level. This was shot during the dry season with mostly dry vegetation and very less waterfall due to off monsoon time.
Adding more Harry continues, “Here the waterfall was enhanced and 70% of greenery re-created in CGI, which took around 2 months to finish. One more shot was the 360 degree chopper shot in which around 80 percent of shot was created in CGI; the shot was stabilized, we added greenery and flowing streams to make the shot look spectacular.”

Also, the team created set extensions for vidamba village “We received a footage having 30 percent of houses and the rest had to be generated with CGI.” Highlights Harry

The prime challenge for the artists was to create heavy transitions seamlessly and realistically. It took around four months for the team to work on the different sequences of the movie.
Gradual transitions of journey progressing through the day made the train sequences more exciting, which were completely shot against green screen in a studio

Transition of a camera pulling out of the moving train through the window and rising high had multiple layers. This took lot of effort and artistic fineness to seamlessly integrate into one move combining live and CGI elements seamlessly.

Climax of the film had a hand to hand combat where props used were dangerous for actors, adding vfx helped keep the fight natural, it also has a burning stove being tossed around and finally concluding into a huge blast

Scenic shots like the train pulls in to a station in early morning; to transitions like the day turning into evening via mobile phone; to a transition where the train enters a tunnel in the evening and the headlight of the trains transforms into a beautiful full moon revealing the landscape at night where the train is passing over a bridge on the river are some more master shots created by redchillies.vfx using visual effects skills.” asserts Keitan. The redchillies.vfx team received interesting reviews on entire movie as people are grateful for showing India so beautiful and never before seen scenery.
Source: Animationxpress
Thursday, October 10, 2013
A Tribute to Srihari – The Multifaceted Actor!

Raghumundri Srihari, better known as Srihari by Telugu Film Industry was one of the most versatile, captivating and multi-faceted actors the film world had. Beginning his career as a stunt master, he evolved eventually to one of the highest paid character actors of Telugu Film Industry. His life speaks of hard work, dedication and tremendous talent throughout his career.
Srihari started off with negative roles in Tollywood, but later shifted to Comedy, Sentiment, Aggression and even Heroism. Nobody can forget the laughter he generated in films like Hello Brother, where he played a Singapore returned relative of the heroine (Soundarya) or Bavagaru Bagunnara, a funny proud villager who falls for the heroine (Rambha). As a hero he was wonderful in roles showcasing sincerity, revenge, anger in films like Ayodhya Ramaiah, Simhachalam and Hanumanthu.
While continuing his tenure as Hero during post 2000s, he never failed to adorn memorable character roles such as the considerate brother in Nuvvostanante Nenoddantana, Dhee, King or even the recent Jr.NTR starrer Brindavanam. However, it was S.S.Rajamouli’s Magadheera which took his talent to new levels with Sher Khan/ Solomon character and people admired the amazing talent of Srihari. He recently made a Bollywood entry withToofan as a villain opposite Ram Charan. Srihari was best known for his powerful dialogue delivery and ability to excel in any sort of emotion at ease.
Despite being a talented actor, Srihari was so human at heart that established Akshara Foundation in the fond memory of his lost daughter. He was a great philanthropist and adopted four villages near Medchal area for caretaking.
Srihari died of Liver Cancer in Lilavati Hospital, Mumbai today. His sudden demise today has been a shock to the entire Telugu Film industry and Film lovers. Telugu Film Industry not only lost a great actor, but also a wonderful human being with philanthropist values and ideals. Though he is physically not present in this World, his films and performances along with the good work he did off the screen will always be remembered. iQlik Movies offers deep condolences to his family and remembers the wonderfully talented character actor.
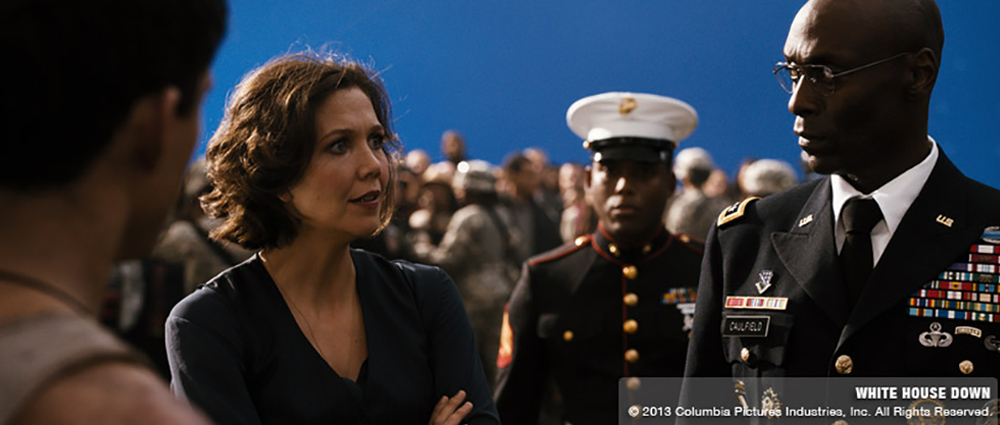
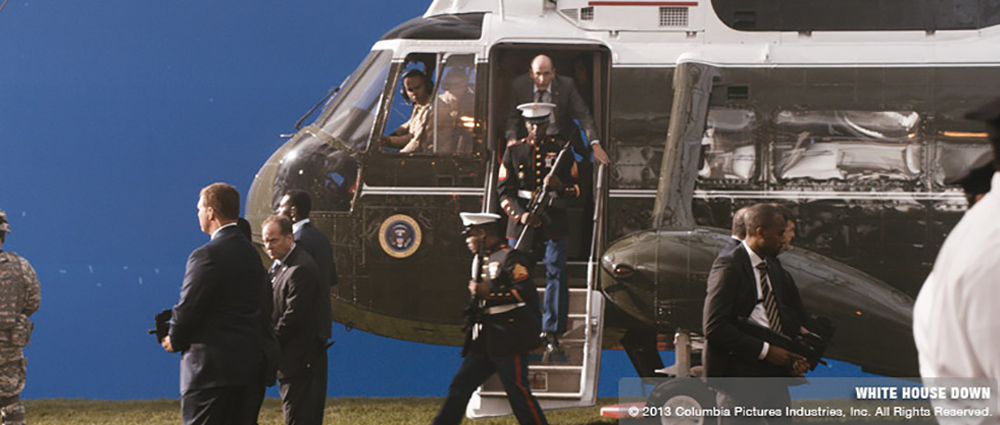
WHITE HOUSE DOWN: Martyn Culpitt (VFX Supervisor) & Mark Wendell (CG Supervisor)
Martyn Culpitt started his career in visual effects with the LORD OF THE RINGS trilogy, then he worked on films such as VANTAGE POINT, INVICTUS or THE GREEN HORNET. He joined Image Engine in 2012.
Mark Wendell is in VFX for over 20 years. He worked on films like SHREK, ALICE IN WONDERLAND, SPEED RACER or PROMETHEUS.
What is your background?
Martyn Culpitt – Visual Effects Supervisor // I have been working in the Industry for over 20yrs. I initially started my career in film set construction at Marmalade Vision in Wellington, New Zealand in 1992. I soon realized I was more interested in the digital world so changed my job and worked my way through the editorial department of the company, becoming Senior Editor within the first few years. Following my interest in visual effects, I moved to the TV, film and visual effects industry as a 2D artist working on films such as THE LORD OF THE RINGS trilogy, TROPIC THUNDER, TWILIGHT, ANGELS & DEMONS, INVICTUS, SALT and THE GREEN HORNET. I was asked to join Image Engine to work as the Compositing Supervisor for R.I.P.D. in 2012. I had always wanted to work on creature films and it was a great opportunity to expand my experience even further.
Since I started in the industry, I have always tried to push my work and keep learning every project, my goal was to one day become a Visual Effects Supervisor. When I was given the opportunity to work with Roland and the Team at Uncharted Territory as Visual Effects Supervisor on WHITE HOUSE DOWN I was thrilled.
Mark Wendell – CG Supervisor // I’ve been in the vfx and animation biz for over twenty years, wearing many hats, including CG supervision, lighting, compositing, pipeline, fx, tools development, layout, and I even have an ‘animation supervisor’ credit! That’s one of the things I like about CG supervision, frankly, is that it’s an excuse to do lots of different jobs throughout the pipeline. I started in this business back when there weren’t any schools for learning CG, and in fact I have a biology degree, so everything I know about CG was self-taught and learned on the job.
How was the collaboration with director Roland Emmerich?
Martyn Culpitt – Visual Effects Supervisor // Our collaboration with Roland was a very smooth process. Working through Marc and Volker we had direct feedback as soon as we needed it, so there was no wasting time. Roland always gave concise feedback and direction, but he would listen to us and appreciated our ideas, which helped us take the shots to the highest level we could together. It did honestly feel like a collaboration rather than Roland just giving notes.
What was his approach to the visual effects?
Martyn Culpitt – Visual Effects Supervisor // Roland, Marc and Volker had done a lot of previs for the film; most films do as it saves a lot of time in the end. On WHITE HOUSE DOWN, It felt like Roland took it to the next level where he would sculpt and design each camera and shot in previs and even further with the team at Uncharted Territory once they had completed filming, before passing it off to us to create the final shot. By the time we started working with them they had pretty much locked down every camera angle and shot. This gave us time to work on the more important details of each shot and given the time constraints we had this was ideal.

How was the collaboration with Production VFX Supervisors Volker Engel and Marc Weigert?
Martyn Culpitt – Visual Effects Supervisor // We had a great collaboration with Marc and Volker, it felt like right from the start we were very much on the same page and our goals we very similar. ‘Make the shots as best and as realistic as we can within the time frame we have’. The White House is such an iconic building and has such a unique look to it so every detail had to be exact and photo real. The goal as always in VFX is to make the work we do as invisible as we could so the viewer isn’t taken out of the movie. I think working with Marc and Volker we were able to achieve this on every level. We had a lot of shots to delivery in a very compressed time frame. We really needed to get feedback and direction as early as we could in the process so would send very early versions of our shots to Marc and Volker, rather than waiting to polish the shots. They really appreciated us doing this as it gave them a lot of creativity at an early stage. This enabled us to get a lot more done and to make sure the shots worked when they were cut into the film. We would then push the shot through the pipeline and get it back as fast as we could to get final notes addressed

What have you done on this show?
Martyn Culpitt – Visual Effects Supervisor // We created nearly 100 shots. The shots were in the Takeover and the Aftermath sequences. The Takeover sequence is just as the terrorists took over the White House and the national guard, reporters and civilians start to congregate on the white house lawn. In the Aftermath sequence our work ranged from blue screen plates, where we had to add CG White House grounds and the Washington Monument, to our biggest shots where we had to create full CG Environments for both the White House and surrounding Washington City with jets and helicopters flying around.
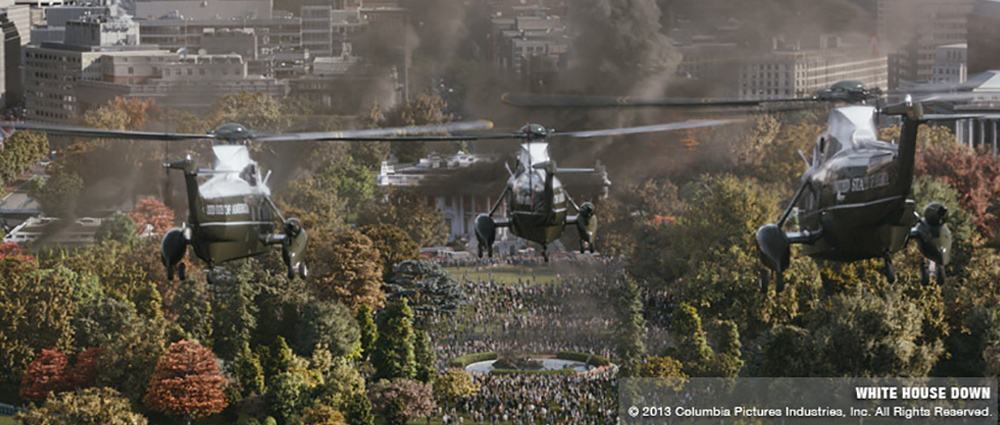
How did you create the three helicopters?
Martyn Culpitt – Visual Effects Supervisor // The Initial helicopter asset was created by Luxx Studios and handed over for us to use. We had to do extensive work to bring it into our pipeline and be able to use our shaders and the textures with our renderer 3Delight. We also had to re-rig the Helicopters so that we could make the landing gear and all other aspects of the chopper move the way we wanted it to.
Mark Wendell – CG Supervisor // Amusingly, we were looking into generating some organic variation between the three helicopters, when we did a bit of research and found out that they are “supposed” to be identical. The US government maintains the fleet of presidential choppers in pristine and identical condition, and scrambles their formation upon takeoff, in order to hide the president’s location. Apparently this is referred to as the presidential “shell game”, but for us, it was an excuse to use the same asset for all instances of the chopper. Seriously, though, with minor variations in things like rotor speed, everything looked great.

Can you tell us more about their animation and the renders?
Martyn Culpitt – Visual Effects Supervisor // The animation was based on the actual previs. Roland, Marc and Volker did a lot of work early on to make sure they had the movement and look of the each shot. We strayed a little from this but most of our animation is based on the previs movement. Obviously once you have that base movement you then add and tweak the subtleties of the movement so that it feels right, once you get all the other assets and environment work done. We used 3Delight as our main renderer with full rayracing. We ran into some issues with noise in our renders and the guys at 3Delight were great about responding quickly tweaking and adjusting the renderer and our shaders to get it fixed up and looking great!

Mark Wendell – CG Supervisor // We’ve been experimenting with a fully ray-traced physically plausible approach to shading, and WHITE HOUSE DOWN was the second show that proved to us that this is the way forward. We worked closely with the folks at DNA Research to solve some noise artifacts and memory consumption issues early on with 3Delight, but in general this was a great experience for us, and we’re continuing to refine our shading workflow in this direction.

What was the most challenging aspect about the helicopters?
Martyn Culpitt – Visual Effects Supervisor // The biggest challenges we faced were getting the reality of the light and environment reflections, and the movement. Each shot we had to be tweaked so that we got the photo-real look we wanted.
Can you explain in detail about the White House creation and its environment?
Martyn Culpitt – Visual Effects Supervisor // Having to create a fully CG environment is one of the hardest things to do in VFX. Especially with such a well known building as the White House, its surrounding grounds and Marine One helicopter. We initially received assets from Method, Luxx, and Prime Focus World, each of which needed extensive work to be able to use them in our pipeline. We spent a lot of time re-linking and adjusting textures, then building our own shaders so we could get the matching look of the assets. Once we had the match, it was then up to us to push them around until we got the approved look that Roland, Marc and Volker were happy with.
Method gave use the White House and the Tree assets. The White House is such a hard thing to create; it honestly feels like the paint on the White House has its own unique quality, it feels like it emits light. The shadows and ambient occlusion plays very differently than any other building. This is very difficult to emulate in CG and especially hard to match to references. We had to do a lot of manipulation to get it to look exactly the way we wanted.
The Environment had over 800 trees, each having many hundreds of leaves, which had to interact with real world forces and be photo real. Having to render this amount of data definitely has its own hurdles that we had to work around. We had to create a very specific tree shader so that we got the same look as our tree references and have the light interaction that we needed to get the photo real quality that Marc and Volker so wanted. Spending the time and creating this shader early on was the key to getting the shots to look so good. Prime Focus gave us some of the people assets, each of which needed extensive work to get them integrated in our pipeline and renderer 3Delight.
Mark Wendell – CG Supervisor // The amount of data shared from Method Studios in particular was huge. The nice thing about the data sharing, though, was that they gave us everything, including not only the final tree models and textures, but all the SpeedTree scene files used to generate those models. That gave us the flexibility to adjust things like wind parameters and geometric details specifically for our shots. This was important for us, since most of our shots were on the south lawn of the White House, while most of Method’s shots were at other locations, so they never needed to add the detail to the south lawn trees that we required. By having the original scene files, we had everything we needed to ‘detail up’ for our shots fairly quickly.
We learned a lot about raytracing massive amounts of geometry on this show, taking advantage of instancing, and using a fairly simple shading model. One of our shading TDs, Daniel Dresser, came up with a nice way to add color variation to tree instances across the parklands at render time, and then any further variation was managed in comp since we provided them with unique hue based ID mattes for each tree.
Can you tell us more about their animation and the renders?
Martyn Culpitt – Visual Effects Supervisor // We used Houdini to create the smoke passes needed for each of our shots. Some of the shots had over 10 different sims to make sure we had the right movement and feel for each element. Some of these would take many hours to render as there was so much detail needed, especially in the close up shots around the balcony of the White House and the windows. It is very hard to create such subtle detail in the smoke, it took us a lot of time and iterations to get the exact feel we wanted. Then we had to use the many passes and AOV’s to get the final look. For the fire we used elements that we had shot and these were comped in.


How did you get your references for the White House?
Martyn Culpitt – Visual Effects Supervisor // Marc and Volker had done extensive work in capturing as much of the White House and Environment as they could. They filmed both from the air and on the ground but there we specific limitations of the area, as it is obviously very protected. So some of the references and textures we had to do quite a bit of paintwork and clean up on to use them for our shots.
Can you tell us more about the crowd creation?
Martyn Culpitt – Visual Effects Supervisor // Prime Focus sent us their assets for the National Guard, Police, civilians and reporters. We spent a lot of time tweaking for our rigging, pipeline and renderer 3Delight. We also created many props and different little pieces for each person to be different. In some of our biggest shots we had over 6000 people, this was itself an issue that we had to figure out when it came to rendering. Using our internal layout system helped us to be able to do this.
We created a rig right at the start so that it could be easily ported over to each different type of person and be adjusted so it would work efficiently. We used our own internal layout system to create the actual crowds and to give us the randomness that we needed. We created a way to apply many different items of clothing, skin color, props etc to give the crowd variation and to adjust where needed. We are able to save a lot of time accessing only a small part of the crowd and tweaking it with out having to adjust the whole crowd at once.
All the motion was applied using ‘motion capture’ that was adjusted and tweaked as needed. Most of it was supplied from Uncharted Territory. But there were cases where our animators would hand animate the crowd so that we got the motion we wanted.
We used Houdini to create the smoke passes needed for each of our shots. Some of the shots had over 10 different sims to make sure we had the right movement and feel for each element. Some of these would take many hours to render as there was so much detail needed, especially in the close up shots around the balcony of the White House and the windows. It is very hard to create such subtle detail in the smoke, it took us a lot of time and iterations to get the exact feel we wanted. Then we had to use the many passes and AOV’s to get the final look. For the fire we used elements that we had shot and these were comped in.
What was the biggest challenge on this project and how did you achieve it?
Martyn Culpitt – Visual Effects Supervisor // The biggest challenges we had were creating such a large crowd and having to render it with our full Environment. The other headache we had was having to create two versions of the White House, one damaged and one pristine. The crowds had their own unique issues that we have now solved after this movie. A lot of it had to deal with so many individual people so we created tools to access individuals or selected pockets without having to open the entire crowd system. It made huge differences both for workflow and also when it comes to render time.
The White House was the hardest asset to create and work with as we had two versions of it in the pipeline at one time. We created the pristine version and then had to destroy/damage it piece by piece. This was done in both the asset and also using matte painting work to fully destroy it. The issue is that the pieces we destroyed were also linked to the pristine version so we had to be very careful not to break the links between each and keep them separate
Was there a shot or a sequence that prevented you from sleep?
Martyn Culpitt – Visual Effects Supervisor // Mainly the Crowds and the Trees, but once we figured out the shaders and the way we could handle that many people then I was finally able to take a deep breath

What do you keep from this experience?
Martyn Culpitt – Visual Effects Supervisor // Working with Uncharted Territory, especially Marc, Volker, Julia and Roland was a fantastic experience and would love to do it again. We worked well together and I think we were able to achieve some fantastic work.
Mark Wendell – CG Supervisor // This show gave us the confidence to commit one hundred percent to physically plausible ray-traced shading, as the advantages both in terms of visual realism as well as lighter time really paid off on this film. Also, based on our experience with building large environments on films like White House Down and Elysium, we’ve invested development effort into expanding our toolset for setting up and rendering complex environments. While the parklands in WHD had hundreds of trees and took a bit of effort to get final renders through, we can now render tens of thousands of trees, in a fraction of the memory and render time of previous shows, using our updated tools.
What are the four movies that gave you the passion for cinema?
Martyn Culpitt – Visual Effects Supervisor //
BLADE RUNNER
ALIEN
THE MATRIX
STAR WARS / THE EMPIRE STRIKES BACK
Mark Wendell – CG Supervisor // For me, it was really just one film… 2001: A Space ODYSSEY. It created an incredibly realistic future in space, and made me aware of how important research and thoughtful art direction are when it comes to science fiction. I had the chance to discuss and screen the film with Doug Trumbull recently, and that was one of my childhood dreams realized. I still study the docking sequence to this day for the amazing composition and shot design. Beautiful work.
Source: Art of VFX
Subscribe to:
Posts (Atom)